Heartbleed is a security breach that compromises passwords. Now is the time to change passwords.

--Bob Jonkman
 My favourite spring flowers are called “bleeding hearts,” but this spring the online world is reeling with the discovery of something completely different — an Internet problem that’s been named “Heartbleed.”
This is is not a computer virus, it is a mistake someone made in the SSL software code. When such a mistake is made in a novel it would be called a typo, but on the Internet, Heartbleed is a serious security flaw.
For years watchdog organizations like the EFF (Electronic Frontier Foundation) have been advocating the adoption of internet security feature called SSL/TLS encryption.
Secure Sockets Layer (SSL), more properly called Transport Layer Security (TLS), has become the default approach for protecting sensitive data flowing over the Internet. SSL uses encryption to provide data confidentiality for connections between users and websites and the web-based services they provide. The vast majority of sensitive web traffic, such as user login screens, e-commerce checkout pages, and online banking, is encrypted using SSL.
Over time more and more websites have adopted this security measure as a way to make the Internet a safer place for you and me. That’s why something like three quarters of the Internet uses SSL/TLS encryption today. This is a good thing.
What is Heartbleed?
The security vulnerability known as Heartbleed is a programming error in the SSL code, and it’s a bad thing because it has made every site that uses SSL vulnerable. Although we are only hearing about it now, it has existed since 2011 or 2012.
I first heard about it on Wednesday, April 9th, 2014. Today (April 11th) the Toronto Star reports the Government of Canada is disabling federal government public websites — at taxtime — in a move to protect users. I don’t understand why they didn’t do this the moment the Heartbleed story broke.
This vulnerability went undetected for something like five months (and apparently NSA knew, but didn’t bother to mention it to its Five Eyes allies, like, say, The Government of Canada, because NSA was too busy exploiting the vulnerability for its own purposes.)
Heartbleed vs Websites
A real world comparison might be that using SSL is like a having double lock deadbolts on the door, and “Heartbleed” is what happens when you forget to lock the back door. Ordinary people can’t fix the Heartbleed problem. It can only be repaired (or patched) by the people running SSL websites & servers.
The Internet giants (Facebook, Twitter, Google etc.) were warned first, so they fixed the problem before the vulnerability was announced publicly. Most of them are trying to allay the fears the media has been whipping up about this all week.
But the Internet is also crowded with many smaller sites that smaller organizations and even ordinary people host themselves. The EFF has kindly explained how our SysAdmins can effect the Heartbleed fix:
The Bleeding Hearts Club: Heartbleed Recovery for System Administrators
Correcting the code is not an immediate fix, because each SSL secure website also must have its Security Certificate updated, which will take time with so many websites doing this.
Heartbleed vs People
For you and me, the biggest problem is that our passwords may be compromised.
This is such a big glitch, most of us won’t be attacked today. Our passwords probably won’t be used to crack our accounts right now because so much of the web is affected.
But we can no longer trust that our passwords are secure.
A Better Analogy
The Apartment Analogy
If the superintendent of an apartment building replaces flimsy locks on the doors of all the rental units with good strong deadbolts, it makes it harder for bad guys to break in.
If someone secretly copies the master key, they can break into apartments.
When clever crooks use the duplicate master key to break into apartments, they are very careful in what they steal. So long as the thefts aren’t noticed, the thieves can keep coming back for more.
No one can tell there is a problem until something is discovered to be missing..
The only defense that the tenants have is to change the locks on the door.
Heartbleed
If a website or email platform adopts SSL/TLS security, the website security becomes much more powerful, because it adds encryption which prevents most security breaches.
A bad guy exploits Heartbleed by using it to download passwords etc.
When Internet criminals exploit the Heartbleed error, their intrusion is invisible. There is no way to see how much security information has been downloded, or whose security has been breached.
No one can actually tell who or what is at risk until there is an actual attack.
The only defense that the users have is to change the passwords on their data.
Like the NSA, black hat hackers (or crackers) may have already filled databases of passwords they’ve found the Heartbleed system. . Even if the System Administrator has fixed the Heartbleed problem for their website, it doesn’t change the fact that any bad guy who cracked the website before the fix still has your password. Or passwords.
If three quarters of the people in Toronto left their doors unlocked, only some of those homes would be broken into right away. Because so much of the Internet has been at risk, they might not get you today, but they might tomorrow, or next week.
HTTPS WEBSITES ARE VULNERABLE
You can tell a website uses SSL by looking at the URL (or the website address). SSL website URLs don’t start with http:// (like this one). SSL URLs all begin with https://. You used to be able to tell with a glance at your browser bar, but today’s fashion is to hide this part of the URL in the browser bar. Some browsers show you are at an SSL site with a padlock symbol, others display SSL URLs in different coloured text, but if you aren’t sure, you should be able to see which it is by cutting and pasting the URL it into whatever text editor you use.
Not all HTTPS websites were vulnerable to Heartbleed because there are different versions and configurations, but there is no easy way for you and I to tell which SSL sites were vulnerable.
As well as SSL websites, any secure site where you use passwords — email, instant messengers or IRC services may have been compromised.
Nobody Knows For Sure
Google, Amazon, Facebook and Paypal claim their customers are not at risk because they have fixed any Heartbleed problems they had.
But because the Heartbleed vulnerability is invisible, until someone actually breaks into our accounts, we can’t even tell if they have been compromised. Even if the Internet giants have fixed their problems, the only way we users can be sure we are safe is by changing our passwords.
Someone has put together a Heartbleed Test so we can discover which SSL sites we use are vulnerable or fixed. Once we know the website is no longer vulnerable to Heartbleed, we can only be sure of our security after our password is changed.
Tumblr just told me to change my password, which means Tumbler has fixed their Heartbleed problem, and wants to be sure its users accounts are secure. Bravo.
I am in the process of typing the URLs of sites where I have passwords (Facebook, Twitter etc.) into the Heartbleed Test to find out they are secure before I change my passwords.
Heartbleed isn’t a threat to websites like Pinterest (http://www.pinterest.com/), techDITZ (http://techditz.russwurm.org/blogs/) or deviantART (http://www.deviantart.com/) that have not yet made the transition to HTTPS
Password No-Nos
- Never use the same password more than once.
- Never use passwords like “Password” or “1234”
- Never use your mother’s maiden name, the name of a loved one, or a birthday… especially these days when all of our personal data is being harvested by corporations and governments alike. If your parent, partner, child, co-worker, next door neighbor or best friend can guess your password, it isn’t secure.
Good Password Practices
I have plenty of passwords, so I keep them filed in a safe place on my desktop computer. But I learned the importance of having a backup copy somewhere else this past summer when I had a major disk failure and I lost something like a terabyte of data — mostly photos —and my password list!
The only time you have to change your password is when:
- it has been breached (or when there is a good probability it has been breached
- when the website owner tells you you must. or
- when you’ve foolishly shared you password with someone you shouldn’t have.
Bob Jonkman, one of the computer security experts I know, recommends using a password manager, such as KeyPassX. But if you don’t he says:
- Use a different password on every site or application for which you need a password. That way if one site is compromised it doesn’t affect every other site. Of course, Heartbleed affects every [https] site, so that’s not always true.
- Make it long. Long passwords are good passwords. 20 characters is good. 16 is probably adequate. 10 is marginal.
- Choose a phrase that is easy to remember, but difficult to guess. As an example, something like “Itookthebustoworkthismorning” — it’s sufficiently long, easy to type, easy to remember.
- Don’t bother with $p3c14l characters or numbers; the bad guys have software that makes those substitutions too. Special characters make the password difficult to type and difficult to remember. If you need to type slowly because of special characters then it’s easy for a bad guy to shoulder-surf and see what you’re typing. According to KeepassX the passphrase “Itookthebustoworkthismorning” has 28 characters for 224 bits of entropy; on the other hand, passwords with 28 random characters with upper-case, lower-case, numbers and special characters (created by KeepassX’s password generator) have only 182 bits of entropy.
- If the site does not offer a password reset option then write down your password, and keep it where you keep your money. If the passphrase is protecting $10 worth of data then keep it in your wallet; if the passphrase is protecting $10,000 worth of data then keep it in a safe. Don’t forget to write down the site or application name, the user ID, and any other credentials you need.
— Bob Jonkman, [kwlug-disc] Heartbleed affected sites
Although Heartbleed is a problem, it is being resolved all over the Internet… all over the world… as you read this.
And SSL encryption is still a good idea, just as house keys are, because personal security is important. And privacy matters.
 Credits:
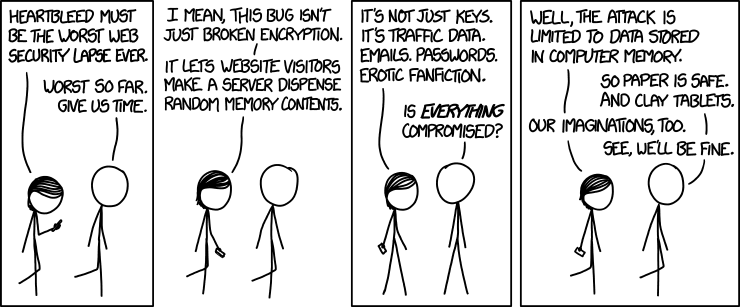
XKCD “Heartbleed” by Randall Munroe is released under a Creative Commons Attribution-NonCommercial 2.5 License.


